PDO thread lifting sits at an interesting intersection of artistry and anatomy. It is not filler, not surgery, pdo thread cost and not a single tool that fixes everything. Done well, it lifts and refines the face with a natural finish that still looks like you after a good night’s sleep. Done poorly, it can create dimples, track marks, or a tight but oddly flat face. The difference comes down to planning, thread selection, vectors, and judgment at the moment of tensioning. This guide unpacks advanced techniques I use in daily practice and the reasoning behind them, so you understand what a PDO thread facelift can and cannot deliver.
How PDO Threads Work beneath the Surface
PDO, or polydioxanone, is a biodegradable suture material that surgeons have trusted for decades. In aesthetic use, PDO threads serve a dual purpose. First, mechanical lifting happens when barbed or cogged threads anchor into the subdermal plane and reposition soft tissue. Second, a biologic response follows as the body lays down new collagen and elastin along the thread’s path. That collagen stimulation, sometimes called PDO thread therapy, is what gives threads their staying power beyond the initial lift.
Threads differ in design and behavior:
- Smooth or mono threads provide light scaffolding for skin rejuvenation rather than facial lifting. They improve texture, fine lines, and crepey skin, especially around the under eye area, lips, and neck. Think collagen boost, not lift. Barbed or cog threads, including bidirectional and unidirectional designs, create traction for a true PDO thread lifting treatment. They grip tissue for repositioning along vectors that matter for the jawline, cheeks, and jowls. Screw or tornado threads, essentially twisted smooth threads, deliver more volumizing stimulus for soft deflation without bulk filler. Molded or press-formed cogs, often thicker, supply stronger engagement than laser-cut barbs and are favored for heavier tissue or midface lift.
The threads integrate as the body heals, gradually resorbing over 6 to 9 months for many patients, with collagen-induced support that may last 12 to 18 months. Patients who maintain stable weight, support their skin with good skincare, and avoid smoking often see longer PDO threads results.
Who Benefits Most from a PDO Thread Lift
The sweet spot for PDO threads for face tightening is mild to moderate facial sagging with early jowl formation, softening of the jawline, descent of the malar fat pad, and a blunted angle under the chin. Patients with realistic expectations who want a non surgical facelift alternative, minimal downtime, and nuanced improvement respond best.
I look for certain characteristics during a PDO thread consultation. Good candidates have decent skin thickness, mild to moderate laxity, and no severe platysmal banding. They move their face expressively and want to keep that dynamism. Those with heavy submental fat and skin redundancy may require staged therapy: first fat reduction and skin tightening, then threads. For very thin, crepey skin with strong deflation, mono threads in series can build a base before we attempt any significant lifting.
Not ideal: very heavy lower face with significant fat pads and thick sebaceous skin, severe neck laxity, or patients who need 5 to 10 millimeters of lift across the board. In those cases, I talk about surgical options or a hybrid plan with radiofrequency tightening and later threads. A PDO threads cosmetic treatment should not be sold as a cure-all for advanced aging.
Mapping the Face: Vectors and Planes That Matter
Face sculpting with PDO thread therapy depends on line of pull, anchoring points, and depth. Insert too shallow, you get rippling and track lines. Too deep, you hook muscle and create animation issues. The target is generally in the subdermal fibrous septa, riding the SMAS-adjacent plane without diving into muscle.
For cheeks and midface, I prefer a zygomatic anchor vector that starts near the hair-bearing temple or high preauricular area and travels toward the nasolabial region. This engages the malar and zygomatic retaining ligaments to elevate the medial cheek and soften nasolabial folds without fullness from filler. For lower face and jawline, my vector runs from the mandibular angle or preauricular zone toward the marionette and prejowl sulcus, catching the jowl fat and mandibular cutaneous ligaments. Where the tissue is heavy, I use two stacked vectors for layered support.
Under the chin, a cross-hatch of smooth threads or fine cogs can refine definition when combined with submental fat reduction. For brow lift, short temporal vectors pull from the lateral brow tail to a deep temporal fascia anchor, creating a light cant without a surprised look. In the neck, mono threads in a fan pattern can provide skin firming, though results are gentler and often require multiple sessions.
Patients often ask for under eye pdo threads near Orlando, FL work. The tear trough is delicate. I use smooth micro-threads placed conservatively in a superficial plane for skin texture improvement, not to replace filler. The key is respect for lymphatic drainage to avoid puffiness.
Choosing Threads Like Tools, Not a One-Size Kit
Ask a carpenter to build a cabinet with only one screwdriver and you’ll get a wobbly result. The same holds for a PDO thread facial treatment. A typical advanced plan mixes thread types and gauges. I may place two to four long molded cogs per side for the primary lift, then add two shorter cog vectors for fine-tuning, and finish with a series of smooth PDO threads for skin rejuvenation over crepe-prone zones.
Heavier tissues demand stronger molded cogs, often 18G cannula housed threads of 17 to 21 cm length. Lighter faces, especially in their 30s and early 40s, do well with 19G or 21G cogs. For texture lines around the mouth or smile lines, mono threads in 29G or 30G gauge work elegantly without bulk. When cheeks have volume loss but the patient resists filler, I will weave screw threads in the subdermal plane, then support with a lighter lift.
I value cannulas over needles for most facial work because they reduce vascular injury risk. Needles still have a place for precise monofilament placement in tight spaces like the philtrum or upper lip lines, but cannulas keep bruising and swelling down for the lifting threads.
The Appointment Flow and Procedure Steps That Set You Up for Success
The pre-procedure routine shapes results as much as the technique. I take images from eight angles, including a gentle smile and animated expressions. Photos are not selfies. Good lighting and a neutral background matter because we use them for real-time vector planning and later for PDO threads before and after comparisons.
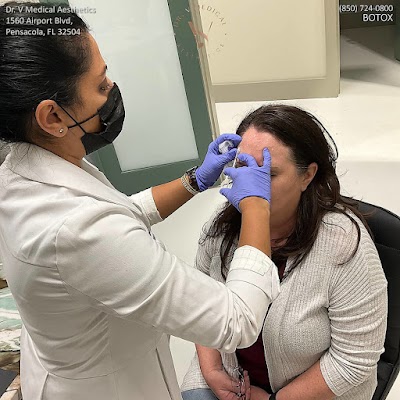
The site prep is medical, not spa-like. I decontaminate with chlorhexidine or iodine, then map the vectors with a dermal marker while the patient sits upright. Markings reflect gravity’s effect, so planning must happen in a vertical position. Local anesthesia follows at entry points and along thread paths as needed. For anxious patients, nitrous analgesia or oral anxiolytics can make the difference between fidgeting and a smooth thread pass.
The insertion uses a pilot needle to open a port for the cannula. I glide the cannula in the planned subdermal plane, feeling for light resistance at fibrous septa. A gentle fanning motion confirms I am not tethered to muscle. Once the thread is seated, I reverse the cannula out and test tension while the patient still sits upright. Subtle adjustments pay off here. Over-tensioning can cause stair-stepping or puckering that does not relax nicely. Under-tensioning wastes a vector.
At the end, I trim and bury the thread ends, massage micro-dimples, and tape the vectors under a supportive dressing if the tissue is heavy. This is where the artistry and patience show. A few extra minutes fine-tuning tension beats a week of puckers every time.
What Recovery Feels Like and How to Protect Your Lift
PDO threads recovery time is short compared with surgery. Expect tenderness, especially at the anchor points, and a feeling like a tight ponytail along the vectors for 3 to 7 days. Bruising varies, from none to light yellow-green patches along the thread line. Swelling is usually mild for 48 to 72 hours. Dimples at the skin entry or along barbs can appear and typically relax within 5 to 10 days. I warn patients not to panic in the mirror on day two, when swelling and asymmetry can temporarily exaggerate.
Post-care is practical. Sleep on your back with your head elevated for the first 3 to 5 nights. Avoid exaggerated facial movements, dental appointments, and deep facial massages for two weeks. No heavy lifting for 48 hours, and no saunas or high-heat workouts for the same period. Gentle icing for the first 24 hours helps. For makeup, wait 24 hours to reduce infection risk at the tiny entry sites. I discourage facials or microneedling over the area for at least 3 to 4 weeks.
Most patients return to work the next day or in two days. If you bruise easily, schedule your PDO thread appointment at least two weeks before an event. That window covers the outliers with prolonged discoloration.
Results: What You See and When You See It
You notice two phases. The first is immediate from the mechanical lift. The face looks sharper through the jawline and lifted at the cheek apple, with a softening along the marionette lines and nasolabial folds. The second phase builds slowly from collagen stimulation, which improves skin texture and firmness over 4 to 8 weeks. The total effect often peaks around the 3-month mark.
PDO threads for wrinkles behave differently than neuromodulators or fillers. Threads do not paralyze muscles or fill creases, but by supporting skin and redistributing tension, they reduce etched lines indirectly. For etched smile lines and marionette lines, I sometimes combine PDO thread tightening treatment with a conservative filler or biostimulator for a more complete result.
Patients often ask how long PDO threads facial contouring lasts. For most, expect visible improvement for 12 to 18 months, with lighter patients in their 30s on the higher end and heavier lower faces on the lower end. Mono thread skin rejuvenation usually needs maintenance every 6 to 9 months for best cumulative gains.
Safety, Side Effects, and How to Avoid Problems
PDO threads are a safe treatment when performed by trained clinicians who respect anatomy. Common side effects include swelling, bruising, tenderness, and transient dimpling. Less common issues are thread visibility in thin skin, prolonged puckering when barbs snag superficially, or asymmetry from uneven tension. Rare complications include infection, thread extrusion, salivary duct irritation in the cheek area, and vascular injury. Using cannulas, mapping vessels in risky zones, and staying in the correct plane significantly lower the risk profile.
I counsel patients about sensations. A pulling feeling when chewing or smiling can persist for a few days. Snapping sounds within the first week sometimes occur as barbs settle through micro-adhesions. These noises are disconcerting but usually benign. If a thread tail peeks through the skin, do not tug it. A clinician can trim or remove it safely.
Medications and supplements matter. If you are on blood thinners or use high-dose fish oil, ginkgo, or turmeric, you will bruise more. If you have active acne or a skin infection, postpone your PDO thread cosmetic procedure until the skin is calm. Patients with autoimmune skin disease should discuss flares and medications in the PDO thread consultation, since increased inflammatory response can affect healing.
The Strategy of Combining Treatments
PDO threads for facial lifting belong in a broader aesthetic plan. When midface volume is depleted, combine a light filler in the deep medial cheek with PDO threads for the lift. This avoids overfilling the lower face, a common mistake. For skin quality, chemical peels, microneedling with or without radiofrequency, and energy-based tightening work well before or after threads, provided you allow appropriate healing time between modalities.
For the neck and jawline, submental lipolysis or microcannula liposuction can precede PDO threads for patients with a double chin and laxity. Address fat first, then use threads to define the mandibular border. In a brow, a neuromodulator can enhance a lateral PDO threads brow lift by relaxing brow depressors and letting the lift settle in balance.
Technique Pearls from Daily Practice
Small choices add up to better PDO thread results. Map vectors with the patient sitting, then reassess after you place each pair of threads. Lift symmetrically, not identically. The right and left faces often age differently. On the heavier side, increase the gauge or add a secondary vector rather than over-tensioning one line.
Undercorrect by a hair. Patients swell and then relax, so a perfectly tight result on the table can look overdone at day three. When you feel a barb snag in a superficial plane, do not force it. Reverse a centimeter, redirect slightly deeper, and glide. At the end, take an extra minute to smooth entry dimples with broad fingertip pressure along the vector, not poking at the dimple itself.
For PDO threads for under eye area, less is more. Use ultra-fine monofilaments in a short length, avoid crossing into the cheek fat compartments, and space repeat sessions 8 to 12 weeks apart to monitor lymphatic tolerance. For PDO threads for nasolabial folds, lift from the lateral cheek rather than stacking threads directly into the fold. The fold reflects ptosis of the lateral soft tissues, not just an isolated crease.
Cost, Value, and How to Budget Wisely
PDO threads treatment cost varies with region, thread type, and how many vectors you need. As a working range in many urban markets, a lower face and jawline lift with 8 to 12 cogs can run from 1,500 to 3,500 USD. A midface and jawline combination with higher-strength molded cogs can reach 2,500 to 4,500 USD. Mono thread skin rejuvenation sessions may cost 300 to 800 USD per treatment area, often done in series. Prices outside large metros can be lower, and practices that include follow-ups or booster threads may package differently.
Focus on value, not just price. An experienced clinician who plans vectors tailored to your face, uses quality threads, and manages aftercare will usually save you money in the long run by avoiding revisions and underwhelming outcomes. When comparing quotes, ask how many threads are included, which designs, and what the follow-up policy is if minor asymmetries need adjustment.
What a Realistic Plan Looks Like for Common Goals
For a 42-year-old with mild jowls, early marionette lines, and decent skin thickness, a PDO threads face contour treatment might include four long molded cogs per side to lift the jowl and sharpen the jawline, plus two shorter cogs to finesse marionette softening. If perioral fine lines exist, add 10 to 20 mono threads around the mouth in a lattice. Expect two days of social downtime, results that build over three months, and maintenance between 15 and 18 months.
For a 35-year-old with cheek flattening after weight loss but minimal folds, two screw threads per cheek for volume support and two cogs per side for cheek elevation can replace a syringe of filler in patients who prefer collagen-based support. Add a few mono threads under the eye for skin quality if tear trough is shallow. This is a lighter PDO thread beauty treatment with very gentle downtime.
For a 55-year-old with significant laxity, a hybrid plan works better. If surgery is off the table, start with radiofrequency microneedling to tighten skin, then place high-strength cogs eight weeks later for lift. Use mono threads in the neck over two sessions. Manage expectations toward improvement, not surgical-level tightening.
Navigating the Myths and Marketing Language
PDO threads non surgical facelift sounds like a promise of surgical results without the knife. That is not accurate. Threads are best at restoring contour lines and softening gravity’s fingerprints, not removing heavy skin or reshaping bone. Another myth is that PDO threads for aging skin always replace fillers or energy devices. The truth is more nuanced. Threads complement, not universally replace, other modalities.
There is also confusion between PDO and other thread materials like PLLA or PCL. Those absorb more slowly and may stimulate collagen differently. I choose the material based on tissue behavior and patient tolerance for longevity versus flexibility. PDO remains the workhorse for many practices because it integrates predictably and offers a good balance of lift, collagen stimulation, and safety.
Minimizing Bruising and Maximizing Comfort
Bruising deters many patients from booking a PDO thread appointment. A few practical tips reduce that risk. Pause nonessential blood-thinning supplements for a week beforehand with your prescribing doctor’s blessing. Avoid alcohol and intense workouts the day prior. On the day, use cool packs pre- and post-placement. I lean on cannulas for cogs and reserve sharp needles for tiny mono attachments. Infiltration with lidocaine plus epinephrine helps with comfort and vasoconstriction, and a slow, deliberate cannula glide limits vessel trauma.
For comfort, buffered lidocaine reduces sting, and patience during anesthesia time pays dividends. With nervous patients, nitrous analgesia smooths the experience so they avoid clenching, which can tighten tissues and create a tougher pass.
How We Document and Evaluate Outcomes
PDO threads before and after photos help us measure subtle changes that memory misses. I pull the hair back, neutralize expression, and standardize head position. For facial definition along the jawline, I track shadow lines under the mandible, the prejowl contour, and the angle to the sternocleidomastoid. For cheeks, I look at the malar highlight position in frontal and oblique views. I also note skin texture changes under controlled light because the PDO thread skin lift treatment often improves reflectivity and smoothness through collagen remodeling.
We schedule a check at two weeks, then again at two to three months. Early visits are for small adjustments if a thread tail appears or a persistent dimple needs release. The later visit captures the collagen phase. If a subtle asymmetry remains, we can add a single cog or a few mono threads. Small, precise tweaks outperform big re-dos.
Two Smart Checklists for Patients and Practitioners
- Pre-appointment patient checklist: Share your full medication and supplement list, including blood thinners and herbals. Schedule around events, allowing two weeks in case of bruising. Pause nonessential blood thinners with medical guidance. Arrive without makeup and with clean skin. Bring reference photos of your best “you” rather than over-filtered images. Practitioner placement checklist: Map vectors with the patient upright and animate to assess dynamic creases. Choose cannulas for lifting threads and reserve needles for small monofilaments. Glide in the subdermal plane, avoid muscle engagement, and retension gradually. Bury and trim ends cleanly, then smooth along the vector to release dimples. Photograph from consistent angles to track outcomes and educate the patient.
Ethical Practice and Setting Expectations
PDO threads aesthetic procedures sit in a gray zone between spa treatments and surgery, yet they require surgical-grade sterility and anatomic rigor. Ethical practice means informing patients that a PDO threads face lift alternative can refresh contours, but not replicate a deep-plane facelift. It means disclosing PDO thread side effects in plain language, offering a plan for issues, and declining when threads are not the right tool.
I also talk about maintenance. Skin continues to age. PDO thread anti aging treatment slows the visible signs via collagen stimulation and mechanical support, but lifestyle still matters. Sun protection, stable weight, and nicotine avoidance do more for long-term results than any single session.
Final Thoughts from the Treatment Room
The most satisfying cases are not the most dramatic. They are the ones where a patient looks rested, their jawline reads clean in daylight, and friends say they look healthy without knowing why. That happens when PDO threads for facial definition are part of a thoughtful plan that respects anatomy, uses the right thread in the right plane, and leaves room for expression.
If you are considering a PDO threads cosmetic facial lift, look for a clinician who shows unedited, standardized before-and-after photos across skin types and ages. Ask how they decide on vectors, which threads they use, and how they handle touch-ups. During the consultation, notice if they listen more than they pitch. That is usually the sign of a practitioner who will design your PDO thread lifting procedure around your face rather than forcing your face to fit a kit.
PDO threads are tools, not magic. In skilled hands, though, they can be the subtler instrument your face has been waiting for, restoring lift and tone while leaving your features honest and familiar. For many, that balance is the real win of a modern, professional facial lift without surgery.